 Pin It
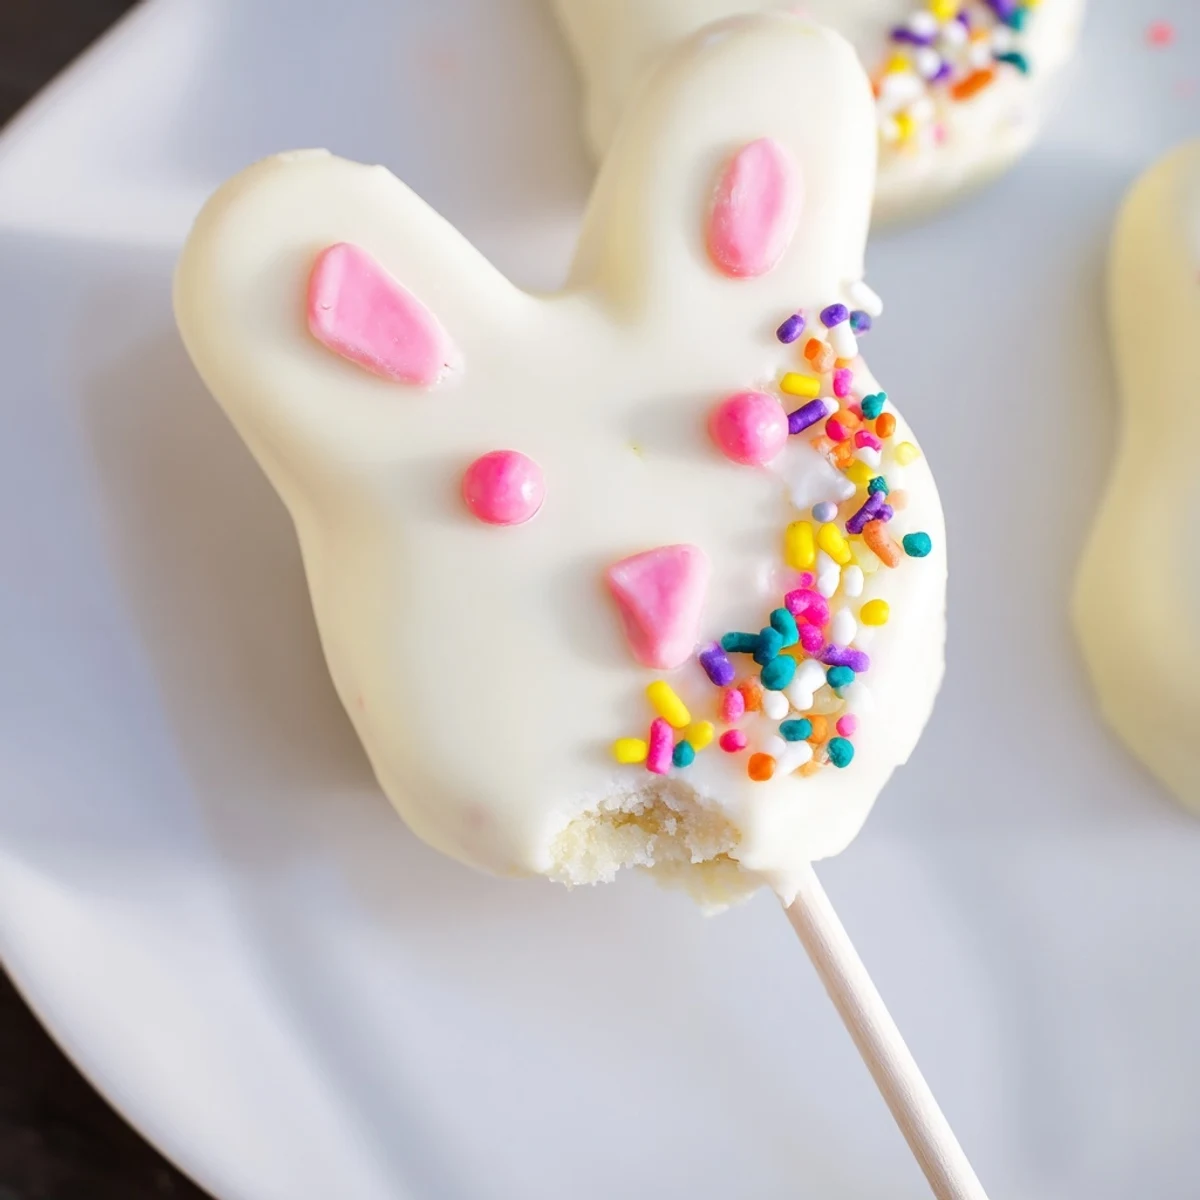
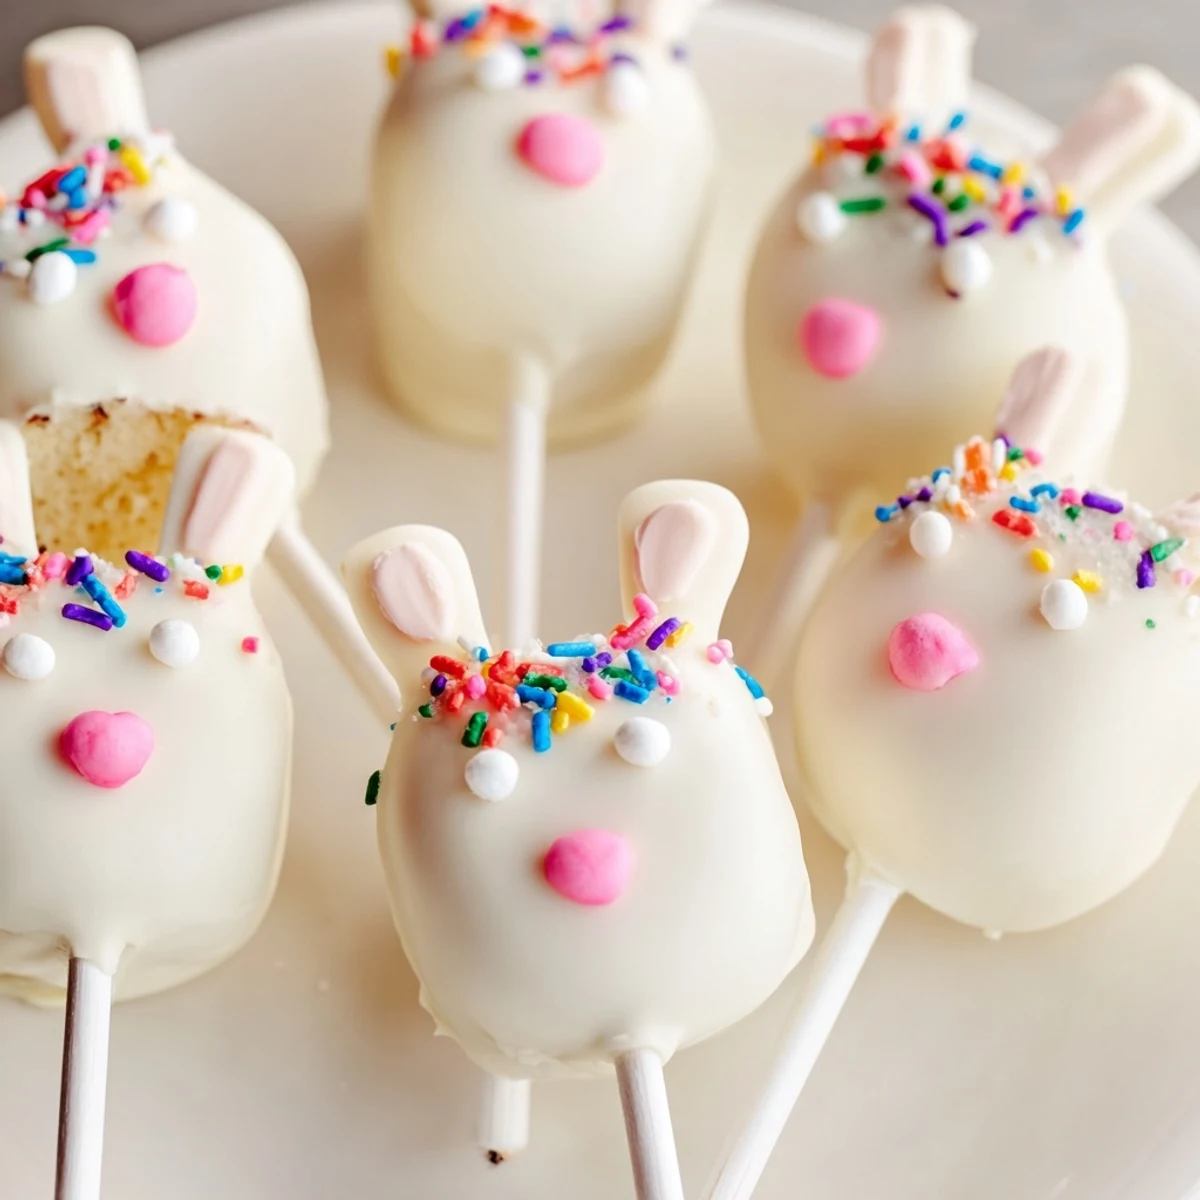
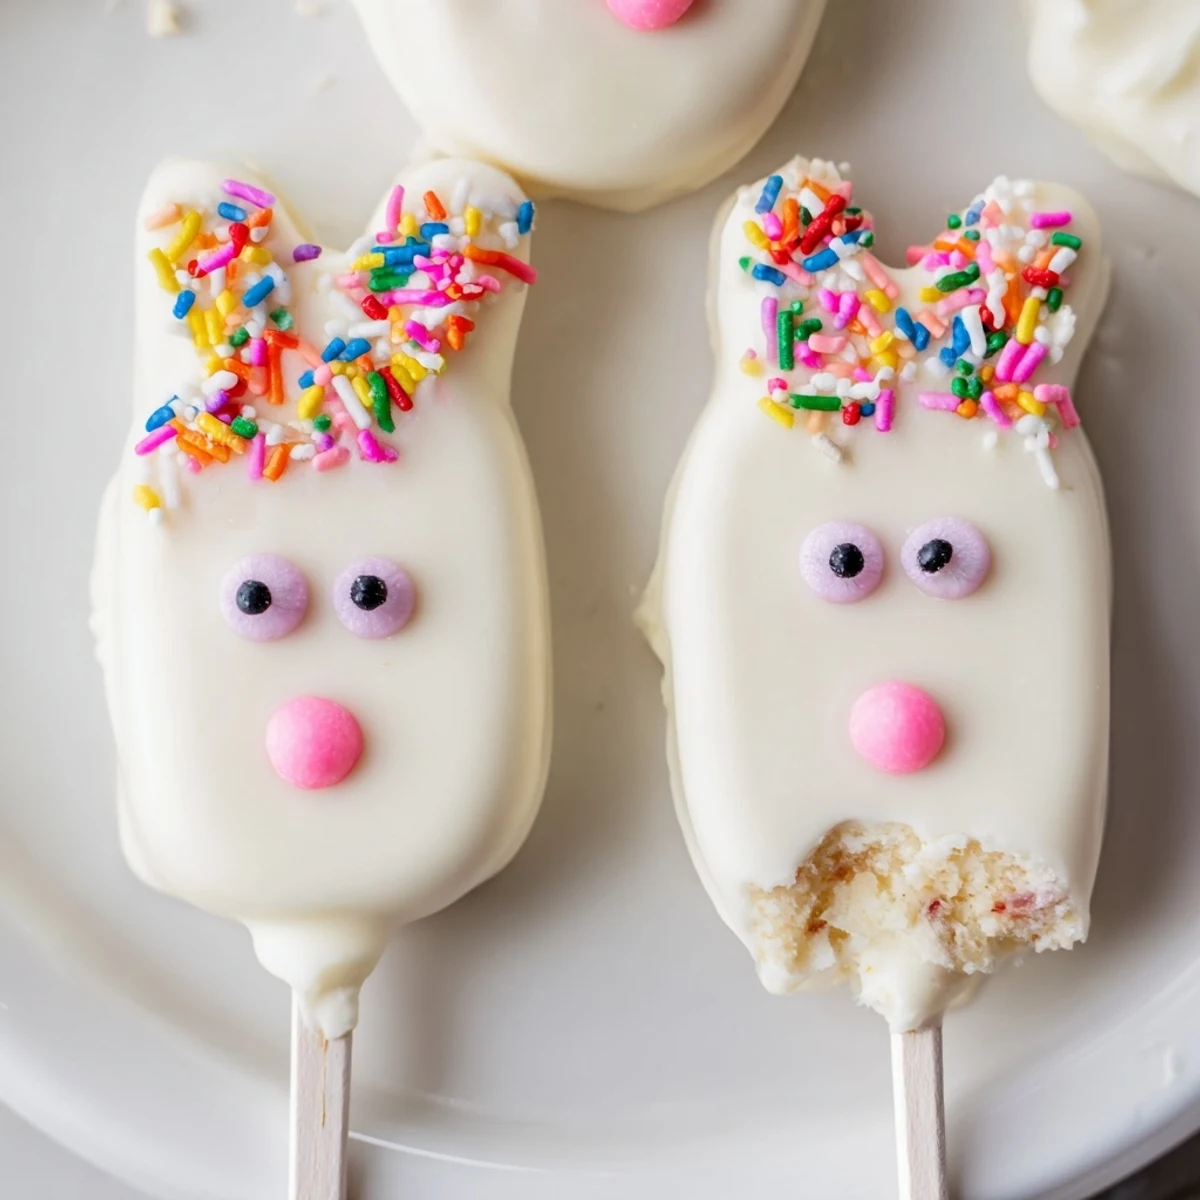
 These charming bunny cakesicles combine moist vanilla cake with a rich white chocolate coating, shaped into adorable faces perfect for Easter celebrations. The cake mixture uses vanilla crumbs blended with cream cheese, butter, and powdered sugar for a dough-like consistency that holds beautifully on sticks.
After shaping and chilling, dip each treat into melted white chocolate and decorate with candy eyes, sprinkles, or fondant features to create unique bunny expressions. The process takes about an hour from start to finish and yields eight delightful handheld desserts.
Customize with different cake flavors like chocolate or lemon, add colored accents with food coloring, or create marbled effects in the coating. Store in the refrigerator for up to three days, making these perfect for preparing ahead of your spring gathering.
The first time I attempted cakesicles for my daughter's Easter gathering, I ended up with chocolate everywhere except on the cake. My kitchen counter looked like a confetti explosion, but those imperfect, lopsided bunny faces disappeared in minutes. Now I've learned that the mess is half the fun, and these adorable treats have become our most requested Easter tradition.
Last spring, my niece insisted on making pink bunny ears for every single cakesicle. Her concentration was so intense that her tongue stuck out slightly, just like her dad's when he's working on something detailed. Those pink-eared bunnies weren't perfectly uniform, but they were made with love and disappeared faster than I could photograph them.
Ingredients
- Vanilla cake crumbs: I've learned that slightly stale cake actually works better than fresh because it holds together more easily when mixed with the binders.
- Cream cheese and butter: Room temperature is non-negotiable here. Cold ingredients leave lumps that make shaping impossible.
- Powdered sugar: This tiny amount makes the difference between a treat that holds its shape and one that slides right off the stick.
- Vanilla extract: Don't skip this even if you're using vanilla cake. It amplifies all the flavors and makes the white chocolate coating taste more intentional.
- White chocolate: Real white chocolate tempering can be tricky, so for Easter treats, I opt for candy melts that are designed to stay smooth and workable longer.
- Cakesicle sticks: Paper sticks work fine, but I've found that the slightly thicker ones feel more secure in little hands during Easter egg hunts.
- Sprinkles and decorations: Have more than you think you need. Something about decorating cakesicles makes everyone generous with the sprinkles.
Instructions
- Mix your cake base:
- Combine cake crumbs, cream cheese, butter, powdered sugar, and vanilla in a medium bowl. The mixture should hold together when you squeeze it, like slightly damp sand at the beach.
- Shape your bunny faces:
- Divide into 8 portions and flatten each into an oval bunny face shape, slightly tapered at the top where ears will go.
- Add the sticks:
- Gently insert a stick into the bottom of each shape, pressing carefully so the cake surrounds it without cracking.
- Chill until firm:
- Refrigerate for at least 20 minutes. This step is what keeps your cakesicles from sliding off the sticks during dipping.
- Melt the coating:
- Heat white chocolate in 30-second bursts, stirring between each interval. The bowl should feel warm but never hot to the touch.
- Dip and tap:
- Dip each cakesicle straight down into the chocolate, pull up slowly, and tap gently against the bowl rim to remove excess coating.
- Decorate immediately:
- Add candy eyes, sprinkles, or fondant pieces while the coating is still soft, or they'll slide right off.
- Set and serve:
- Let them stand at room temperature for 15 minutes or refrigerate for 5. The coating should be completely firm before packaging or serving.
 Pin It
 These have become such a tradition that my friends now request them for their own Easter gatherings. Something about those little bunny faces makes even the most stressed adults pause and smile, which might be the best gift of all.
Making Them Ahead
I shape and chill the cakesicles the day before, then do the dipping and decorating the morning of the event. The coating stays perfectly fresh, and I'm not stuck in the kitchen while guests arrive.
Kid-Friendly Decorating
Set up a decorating station with bowls of sprinkles, candy eyes, and pre-cut fondant pieces. The white chocolate coating stays workable for about 10 minutes, which is exactly enough time for small decorators to work their magic.
Storage and Serving
These keep beautifully in the refrigerator for up to three days, layered between parchment paper in an airtight container. Bring them to room temperature about 20 minutes before serving for the best texture and flavor.
- Stand them upright in a jar filled with jelly beans for the cutest Easter display.
- Wrap individual cakesicles in clear bags tied with pastel ribbon for party favors.
- If serving outdoors, keep them shaded as white chocolate softens quickly in spring sun.
 Pin It
 There's something magical about turning simple cake crumbs into a celebration centerpiece. These bunny cakesicles have a way of making Easter morning feel just a little more special.
Recipe FAQs
- → What are cakesicles made of?
-
Cakesicles consist of cake crumbs mixed with cream cheese, butter, and powdered sugar to form a dough-like mixture. This gets shaped, chilled, then coated in melted chocolate and decorated with various toppings.
- → How long do bunny cakesicles stay fresh?
-
Store your cakesicles in an airtight container in the refrigerator for up to 3 days. The cool temperature helps maintain the white chocolate coating and keeps the cake mixture fresh.
- → Can I use different cake flavors?
-
Absolutely! While vanilla works beautifully, try chocolate, lemon, red velvet, or funfetti cake crumbs. Each flavor creates a unique variation that pairs wonderfully with the white chocolate coating.
- → Do I need a special mold for cakesicles?
-
A cakesicle mold helps create uniform shapes, but it's not essential. You can hand-shape the cake mixture into flattened ovals or bunny faces by hand, then insert the sticks before chilling.
- → What decorations work best for bunny faces?
-
Candy eyes, sprinkles, fondant ears and noses, or even pretzel sticks for ears work wonderfully. Food coloring pens or gel let you add fine details like whiskers and pink noses after the chocolate sets.
- → Can I make these ahead for Easter?
-
Yes! These are perfect for preparing 1-2 days in advance. Store them layered between parchment paper in an airtight container in the refrigerator, and they'll be ready for your celebration.
