 Pin It
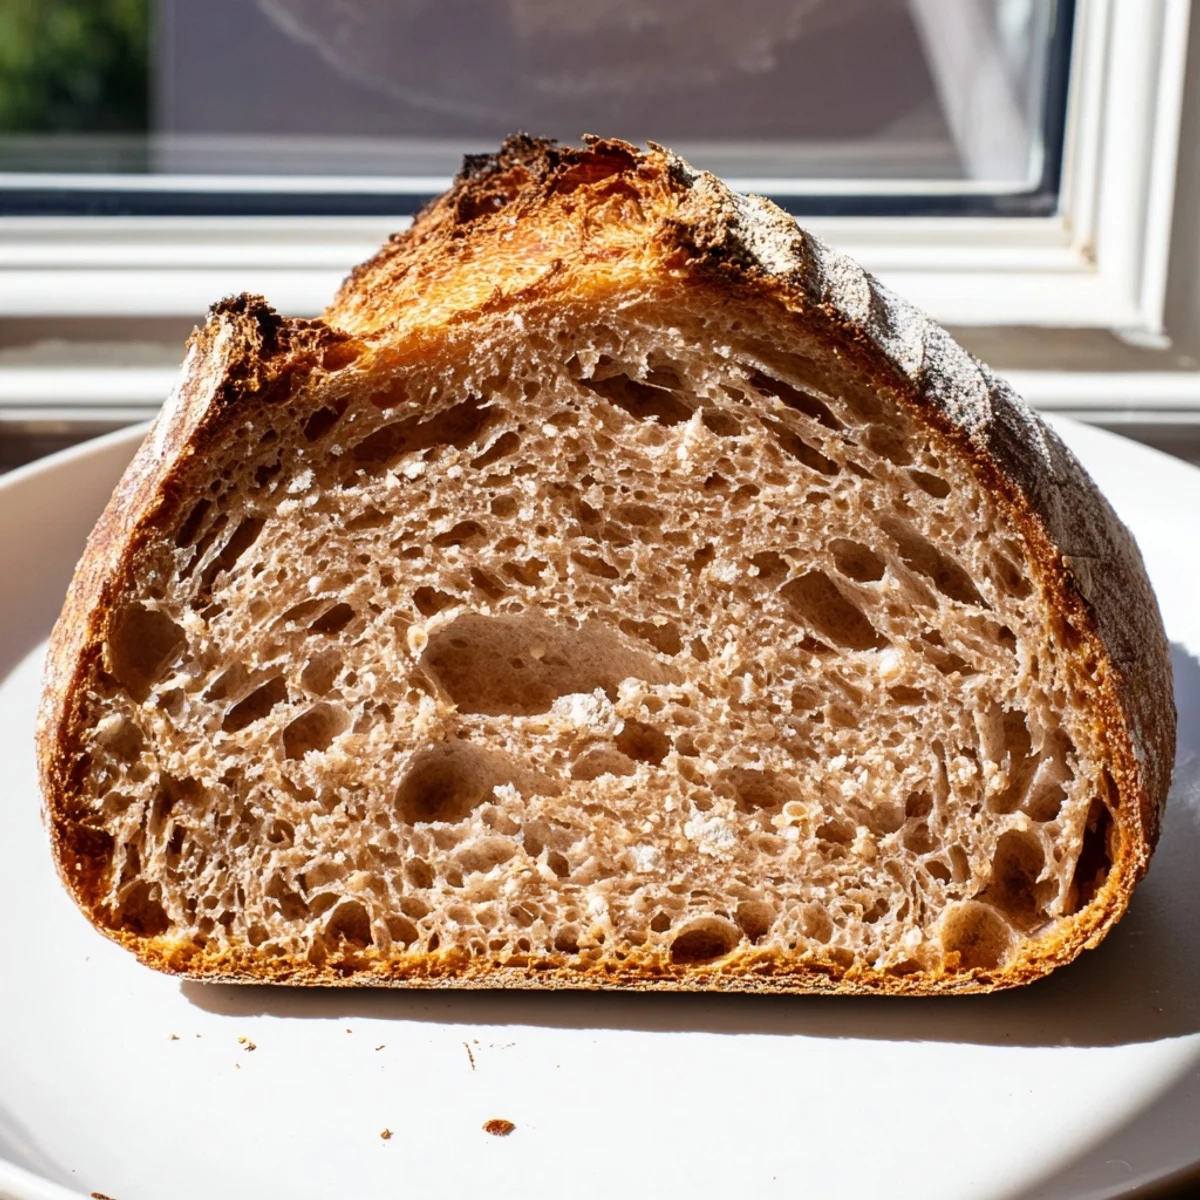
 Craft an exceptional traditional sourdough loaf with wild yeast, featuring the signature tangy flavor and rustic texture that makes artisanal bread unforgettable. This method combines ancient fermentation techniques with precise timing to develop deep flavor complexity.
The process begins with an autolyse rest period, followed by strategic stretch-and-fold strengthening sessions that build structure without extensive kneading. A long room-temperature fermentation allows wild cultures to work their magic, while cold proofing in the refrigerator develops subtle acidity and enhances shelf life.
Baking in a preheated Dutch oven creates the perfect steam environment for that coveted crackling crust and airy interior. The result is a stunningly beautiful loaf with professional bakery qualities that will elevate any meal from morning toast to dinner accompaniment.
The first time I baked sourdough, my entire apartment smelled like a rustic bakery. I had no idea what I was doing, but that crackling crust sound as the loaf cooled made me feel like I'd discovered something ancient. Three years later, I'm still feeding that same starter weekly, and the ritual has become the most grounding part of my cooking routine.
Last winter, during a particularly brutal snowstorm, I made six loaves back to back and delivered them to neighbors who were stuck inside. The texts I received later that night, describing warm butter melting on fresh slices, reminded me why bread has always been about community.
Ingredients
- Bread flour (500 g): Higher protein content creates that signature chewy crumb and impressive oven spring
- Water (350 g, room temperature): Hydration level of 70% yields a workable dough that still bakes with an open crumb
- Active sourdough starter (100 g, 100% hydration): Should be bubbly and doubled in size, fed 6-8 hours before mixing
- Fine sea salt (10 g): Enhances flavor and strengthens gluten structure
Instructions
- Mix the autolyse:
- Combine flour and water in a large bowl until no dry flour remains. Cover and let rest for 1 hour. This crucial step allows enzymes to begin breaking down starches, making gluten development easier later.
- Incorporate starter and salt:
- Add your active starter and sea salt to the bowl. Use your fingers to pinch and squeeze the dough until fully cohesive and the starter is evenly distributed.
- Build strength through folding:
- Perform 4 sets of stretch and folds every 30 minutes for 2 hours. Grab one side of the dough, stretch it upward, and fold it over the center. Rotate the bowl and repeat four times per set.
- Bulk fermentation:
- Cover the bowl and let the dough rise at room temperature for 4 to 6 hours. You're looking for roughly doubled volume and visible bubbles on the surface.
- Shape the loaf:
- Turn the dough onto a lightly floured surface and fold the edges toward the center to create tension. Flip the dough over and use your bench scraper to drag it against the counter, forming a tight round or oval.
- Cold proof:
- Transfer the dough seam-side up into a floured proofing basket or towel-lined bowl. Cover and refrigerate for 8 to 12 hours. This cold fermentation develops incredible flavor and makes scoring easier.
- Preheat with enthusiasm:
- Place your Dutch oven in the oven and preheat to 230°C (450°F) for at least 30 minutes. That preheated pot is what creates the professional steam environment for a crisp crust.
- Score and bake:
- Gently invert the dough onto parchment paper. Use a sharp lame or knife to score the top with a decisive cut, about 1/2 inch deep. Transfer the loaf into the hot Dutch oven, cover with the lid, and bake for 20 minutes.
- Finish with drama:
- Remove the lid and bake another 20 minutes until the crust is deep golden brown. The loaf should sound hollow when tapped on the bottom.
- The hardest part—waiting:
- Cool on a wire rack for at least 1 hour before slicing. Cutting into warm bread will make the crumb gummy and ruin your hard work.
 Pin It
 My mother-in-law still talks about the first sourdough loaf I made for Sunday dinner. She's Italian and takes her bread seriously, so watching her close her eyes after the first bite was the moment I knew I'd finally mastered it.
Understanding Your Starter
A healthy starter should smell pleasantly tangy, almost like yogurt or beer, with visible bubbles throughout. If it smells like acetone or alcohol, it needs feeding. If it has a pink or orange tint, it's gone bad and should be discarded.
Storing Your Bread
Homemade sourdough has no preservatives, so it molds faster than commercial bread. Store cut-side down on a cutting board for up to 2 days, or freeze slices for up to 3 months. The fridge actually accelerates staling, so avoid it unless you plan to toast everything.
When Things Go Wrong
A dense loaf usually means under-fermented dough or insufficient steam during baking. A flat spread means over-proofing or weak shaping. Each failure teaches you something about dough behavior, so take notes and try again.
- Use an oven thermometer, as most ovens run 25°F off from the dial
- Experiment with different flours to see how they affect flavor and texture
- Keep a baking journal to track what works in your specific kitchen environment
 Pin It
 There's something profoundly satisfying about turning flour, water, and salt into bread that nourishes both body and soul. May your crust always be crackling and your crumb always open.
Recipe FAQs
- → What makes sourdough different from regular bread?
-
Sourdough relies on wild yeast and beneficial bacteria naturally present in flour rather than commercial yeast. This slow fermentation process creates distinctive tangy flavor, improves digestibility, reduces gluten content, and extends shelf life significantly compared to conventionally leavened breads.
- → Why is my dough not rising properly?
-
Several factors affect rising: inactive starter that needs refreshing, cool room temperature slowing fermentation, or insufficient bulk fermentation time. Ensure your starter bubbles vigorously within 4-6 hours of feeding, maintain a warm environment (24-26°C), and allow dough to double during bulk fermentation before proceeding.
- → Can I skip the Dutch oven?
-
While possible, results will differ significantly. The Dutch oven creates essential steam for crust development. Without it, place a metal pan on the bottom oven rack and add ice cubes when baking begins to generate steam, though achieving the same professional crust becomes challenging.
- → How do I know when bulk fermentation is complete?
-
Look for visual cues: dough should appear puffy with visible fermentation bubbles on the surface, increase in volume by 50-75%, and have a jiggly consistency. The poke test is reliable—press dough gently with a floured finger; if it springs back slowly and leaves a slight indentation, fermentation is complete.
- → Why must I wait before slicing?
-
Cutting into hot bread releases steam trapped in the crumb, resulting in gummy texture and compromised structure. The cooling period allows internal moisture to redistribute evenly throughout the loaf, ensuring proper texture development and that sought-after chewy crumb characteristic of well-made sourdough.
- → How long does sourdough stay fresh?
-
Properly stored sourdough maintains quality for 4-5 days at room temperature when wrapped in cloth or paper. For longer storage, freeze sliced portions in airtight bags for up to three months. The naturally acidic environment inhibits mold growth, giving sourdough superior shelf life compared to commercial breads.
