 Pin It
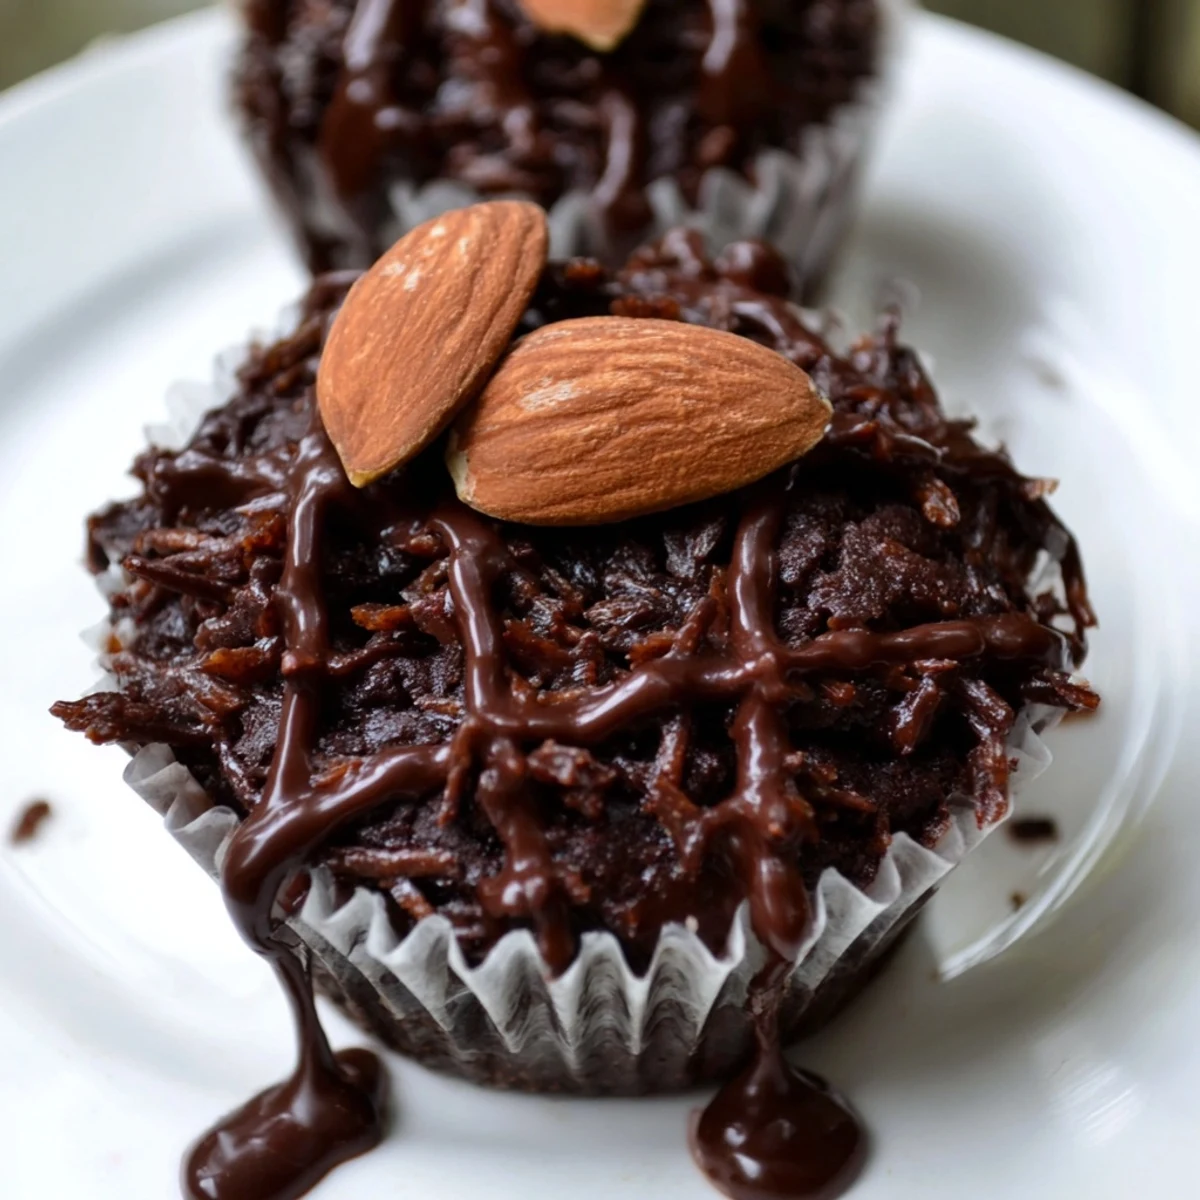
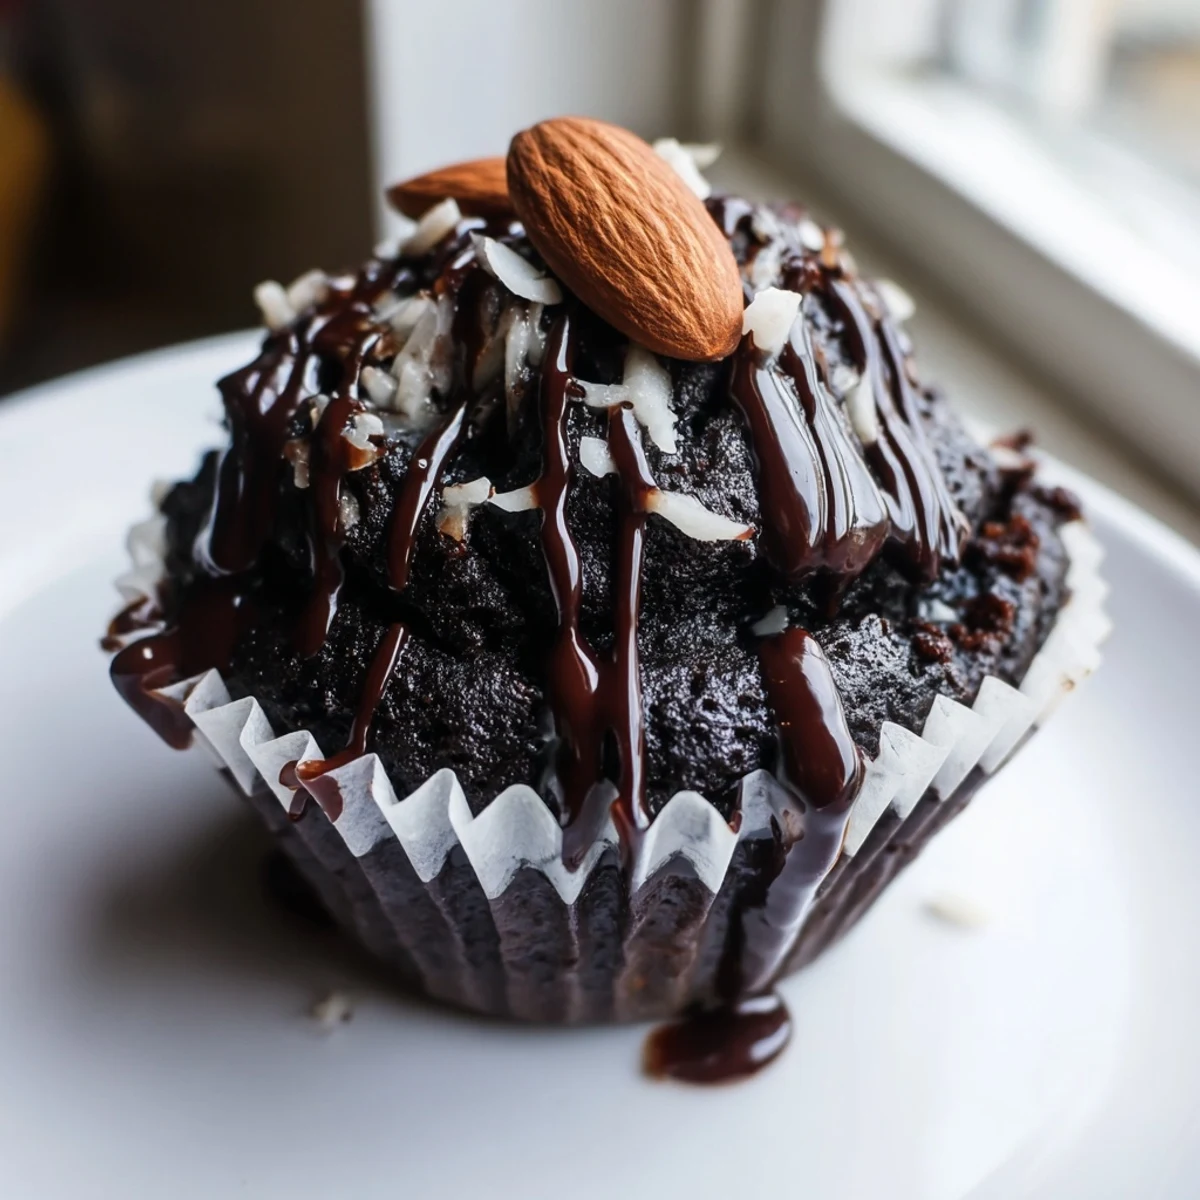
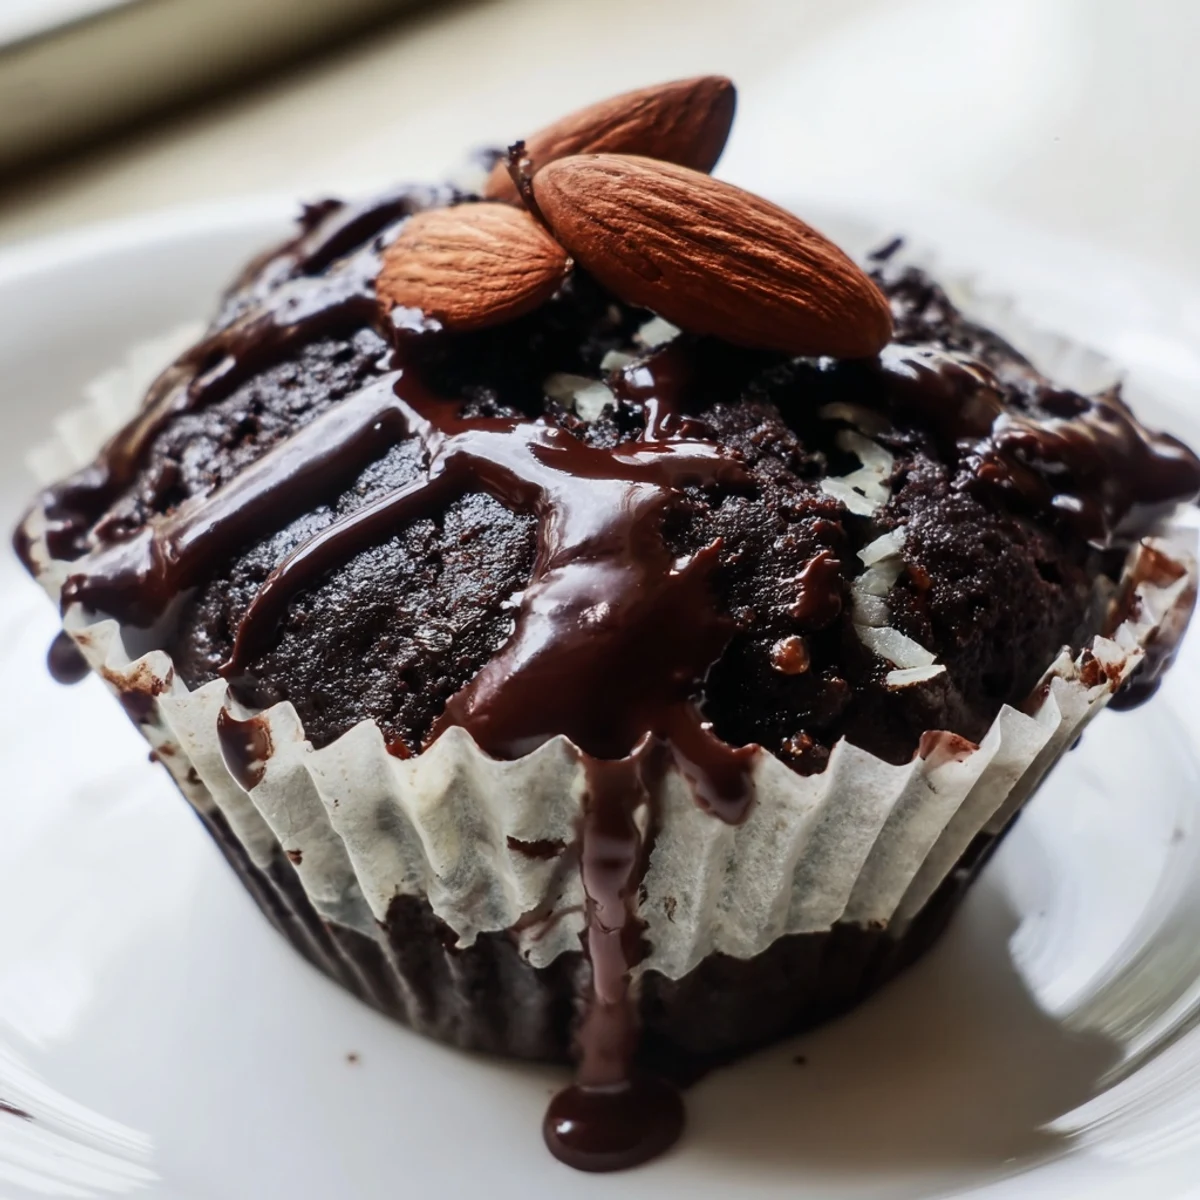
 These flourless chocolate cupcakes capture the essence of the beloved Almond Joy candy bar. Each rich, gluten-free cupcake features a velvety chocolate base made with melted chocolate chips, butter, eggs, and cocoa powder. The center gets a surprise filling of sweetened coconut mixed with condensed milk and vanilla, while toasted roasted almonds crown the top. A final drizzle of melted chocolate adds the perfect finishing touch.
Ready in just 45 minutes with only 20 minutes of active preparation, these treats deliver restaurant-quality dessert results. The flourless technique creates an incredibly moist, fudgy texture that chocolate lovers will adore. Perfect for gatherings, holidays, or whenever a decadent gluten-free dessert is in order.
The smell of melting chocolate and butter has pulled me into the kitchen more times than I can count, but there was something different about the afternoon I first attempted these flourless cupcakes. My sister had just discovered she needed to go gluten-free, and I was determined that she wouldn't have to miss out on the rich, fudgy desserts we both loved. The moment these emerged from the oven with that slightly puffed center and crackled top, I knew we'd stumbled onto something special.
I brought a batch to my book club last fall, and before I could even explain they were gluten-free, three people had already asked for the recipe. Watching friends who claimed they hated coconut go back for seconds was one of those quietly satisfying kitchen moments that keep me experimenting with new flavor combinations.
Ingredients
- Semi-sweet chocolate chips: The quality of chocolate you choose will directly impact the final flavor, so reach for chips you'd enjoy eating straight from the bag
- Unsalted butter: Room temperature butter melts more evenly, preventing any seizing when combined with warm chocolate
- Granulated sugar: Don't reduce this amount or the cupcakes won't set properly, as sugar provides structure in flourless baking
- Salt: Just half a teaspoon intensifies the chocolate flavor and balances the sweet coconut filling
- Large eggs: These must be at room temperature to emulsify properly with the warm chocolate mixture
- Unsweetened cocoa powder: Sifting this prevents any lumps and ensures that silky, smooth batter consistency
- Unsweetened shredded coconut: The condensed milk will sweeten this filling, so starting with unsweetened coconut keeps the overall sweetness balanced
- Sweetened condensed milk: This acts as the binding agent for the coconut, creating that classic Almond Joy candy bar texture
- Vanilla extract: Pure vanilla extract rounds out the coconut filling and adds depth to the chocolate base
- Whole roasted almonds: Roasted almonds have that perfect crunch and slightly nutty flavor that pairs beautifully with chocolate
- Additional chocolate chips: These are melted for the final drizzle, adding that professional finishing touch and extra chocolate intensity
Instructions
- Prep your oven and pan:
- Set your oven to 350°F (175°C) and line a standard muffin tin with 12 paper liners, taking care to press them firmly into the cups so they hold their shape when filled.
- Melt the chocolate base:
- Combine 1 cup of chocolate chips with the butter in a microwave-safe bowl and heat in 20-second intervals, stirring between each, until you have a glossy, smooth mixture that resembles warm pudding.
- Build the batter:
- Whisk in the sugar and salt until they've dissolved into the warm chocolate, then add each egg individually, whisking thoroughly until the mixture thickens slightly before adding the next.
- Add the cocoa:
- Sift the cocoa powder directly into the bowl and fold it in gently until the batter becomes dark, smooth, and pourable, with no visible dry streaks remaining.
- Fill the liners:
- Divide the batter evenly among the 12 prepared liners, filling each only halfway, as the cupcakes will rise and you need room for the coconut filling.
- Make the coconut surprise:
- In a small separate bowl, mix the shredded coconut with sweetened condensed milk and vanilla until every strand is coated and the mixture holds together when pressed.
- Nestle the filling:
- Roll a heaping teaspoon of the coconut mixture into a small ball and gently press it into the center of each unbaked cupcake, being careful not to press it all the way to the bottom.
- Bake until just set:
- Slide the tin into the oven and bake for 20-25 minutes, watching for the edges to become firm while the centers remain slightly puffed and soft.
- Cool with patience:
- Let the cupcakes rest in the pan for a full 10 minutes, during which time they'll settle slightly, then carefully transfer them to a wire rack to cool completely.
- Add the finishing touches:
- Press two roasted almonds into the top of each cooled cupcake, melt the remaining chocolate chips, and drizzle it generously over the almonds and cupcakes, allowing it to set before serving.
 Pin It
 My grandmother always said that the best desserts are the ones that make you close your eyes after that first bite, and these cupcakes have become that kind of experience in our house. They've turned into my go-to for dinner parties, bake sales, and those Tuesday nights when nothing but chocolate will do.
Getting the Texture Just Right
The trick to achieving that perfect crackly top and fudgy interior is in how you handle the eggs and chocolate mixture. Adding room temperature eggs one at a time creates an emulsion that gives these cupcakes their structure, and taking the time to whisk thoroughly after each addition makes all the difference between a dense, disappointing cupcake and one that melts in your mouth.
Making Them Your Own
While the classic Almond Joy combination is hard to beat, I've found that swapping dark chocolate chips for semi-sweet creates a more sophisticated version that adults seem to love. You could also fold a handful of mini chocolate chips into the coconut filling for even more chocolate intensity, or toast the shredded coconut before mixing it with condensed milk for a deeper, nuttier flavor profile.
Storage and Serving Tips
These cupcakes actually improve slightly after sitting overnight, as the flavors have time to meld and the texture becomes even more fudgy and dense. Store them in an airtight container at room temperature, where they'll stay perfectly fresh for up to three days, though in my experience they rarely last that long. Serve them slightly warmed if you want the chocolate center to become even more molten and indulgent.
- Pop a cooled cupcake in the microwave for 10-15 seconds before serving to recreate that fresh-baked experience
- If transporting these, wait until you reach your destination before adding the almond toppers and chocolate drizzle
- For gifting, place each cupcake in a individual paper baking cup and tie with baker's twine for a bakery-style presentation
 Pin It
 Whether you're gluten-free or just someone who believes that life is too short for dry cupcakes, I hope these bring as much joy to your kitchen as they've brought to mine.
Recipe FAQs
- → Can I make these flourless cupcakes completely dairy-free?
-
Yes, simply substitute dairy-free chocolate chips and plant-based butter or coconut oil for the regular butter. The texture remains rich and fudgy while accommodating dairy-free dietary needs.
- → How do I store these flourless chocolate cupcakes?
-
Keep cupcakes in an airtight container at room temperature for up to 3 days. The coconut filling stays fresh and the chocolate drizzle maintains its glossy finish without refrigeration.
- → Why should I not overbake these flourless cupcakes?
-
Overbaking causes the flourless chocolate base to become dry and lose its signature fudgy texture. Remove them when edges are set but centers still have a slight puff—they'll continue cooking while cooling in the pan.
- → Can I use sweetened coconut instead of unsweetened?
-
You can substitute sweetened shredded coconut, though you may want to slightly reduce the condensed milk to balance sweetness. The texture will remain similar regardless of coconut type used.
- → What's the best way to melt chocolate for the drizzle?
-
Melt chocolate chips in the microwave in 20-second intervals, stirring between each burst. This prevents scorching and ensures smooth, glossy chocolate for the perfect finishing drizzle.
- → Can I prepare the coconut filling ahead of time?
-
Absolutely! Mix the coconut filling up to 2 days in advance and store it covered in the refrigerator. Bring to room temperature before assembling—it makes the process even quicker.
