 Pin It
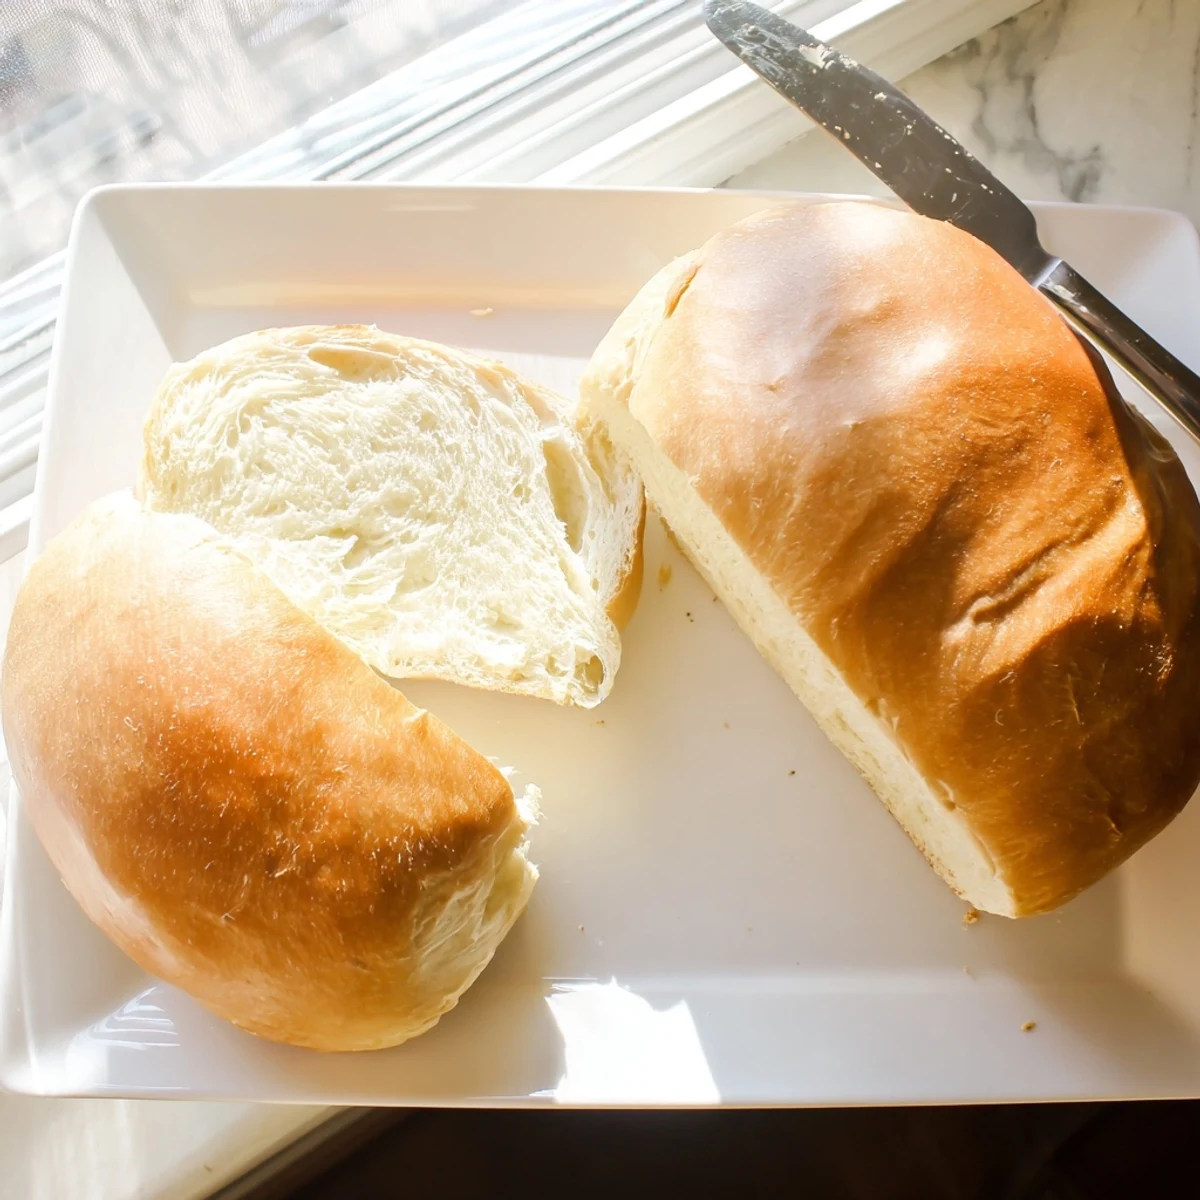
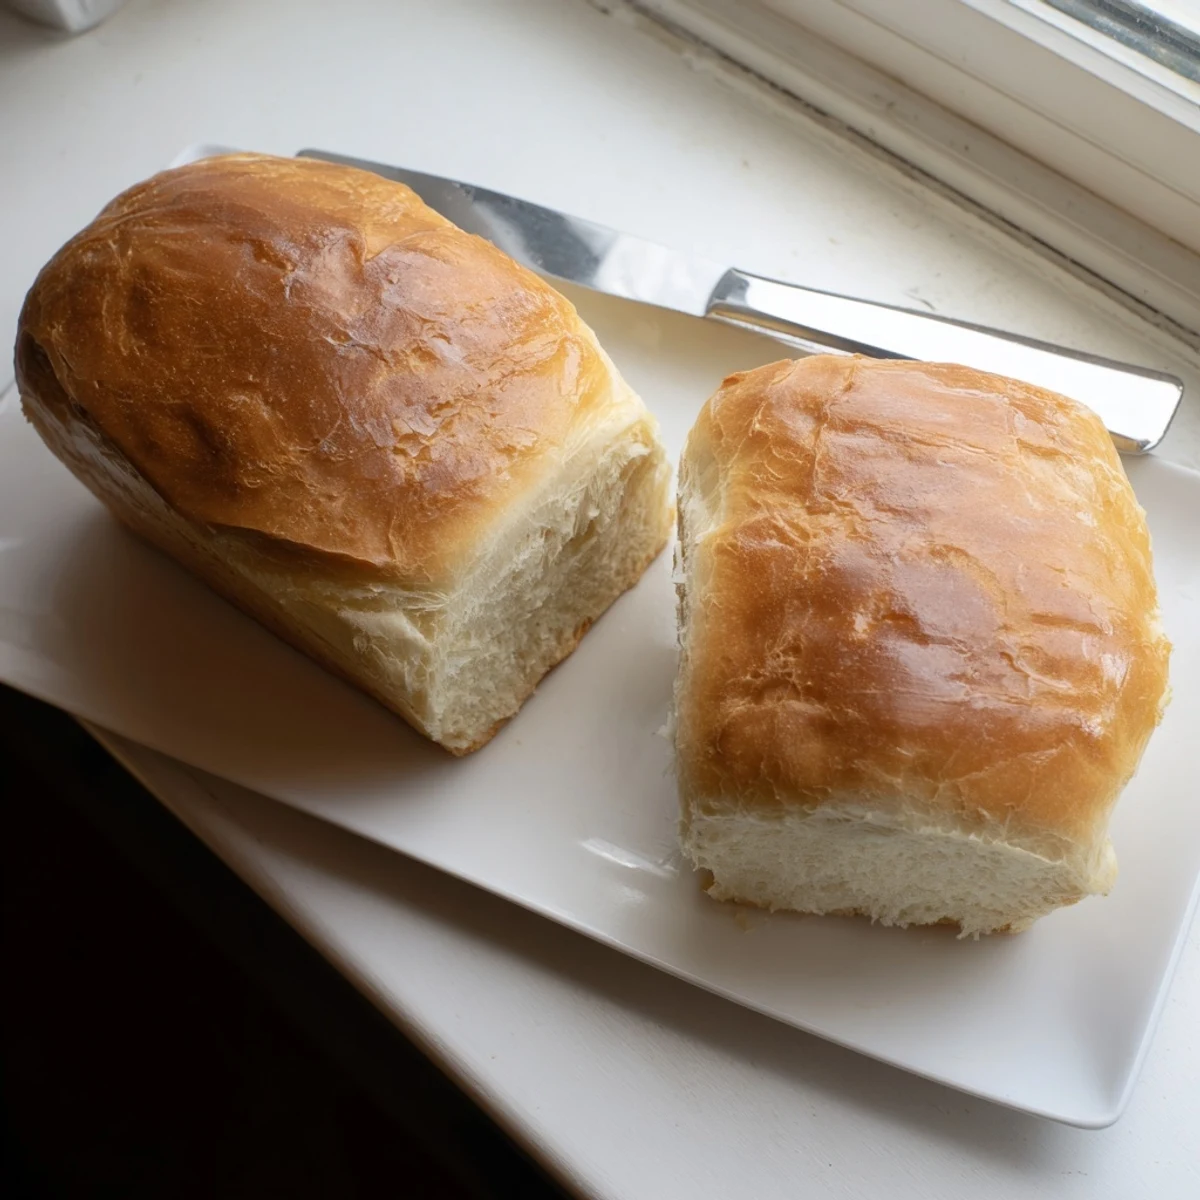
 Create bakery-quality white bread at home with this time-honored Amish technique. The dough comes together with just warm water, sugar, yeast, salt, oil, and flour. After two simple rises and 30 minutes in the oven, you'll have two golden loaves with pillowy interiors and tender crusts.
The slight sweetness makes this exceptionally versatile—excellent for morning toast, lunchtime sandwiches, French toast, or bread pudding. Brush with melted butter while warm for an extra soft crust that keeps fresh for days.
My grandmother kept a glass bread box on her counter, and the moment you lifted that heavy lid, the warm, yeasty air hit you like an embrace. She taught me that bread-making isn't about precision—it's about learning the dough, watching it breathe, and knowing when it's ready by touch and smell alone.
Last winter, during a snowstorm that trapped us inside for three days, I made batch after batch of this bread. My kids stood on kitchen chairs watching the dough rise, and by the time the first loaf came out of the oven, they'd already planned exactly how thick they wanted their buttered slices.
Ingredients
- Warm water: 110°F is the sweet spot—too hot kills the yeast, too cold makes it sluggish, so test it against your wrist like baby formula
- Granulated sugar: Feeds the yeast and creates that characteristic mild sweetness that makes this bread so irresistible
- Active dry yeast: Make sure it foams during the proofing step—if it doesn't bubble, start over with fresh yeast
- Salt: Essential for flavor balance and helps control the yeast's growth rate
- Vegetable oil: Keeps the bread tender and extends its shelf life, though melted butter works beautifully too
- All-purpose flour: Start with 5½ cups and add more only if needed—the dough should be soft and slightly tacky, not dry
Instructions
- Wake up the yeast:
- Dissolve sugar in warm water, sprinkle yeast on top, and wait 5–10 minutes until a foamy layer forms on the surface—that's how you know it's alive and ready to work.
- Build the dough:
- Stir in salt and oil, then gradually add flour one cup at a time, mixing after each addition until the dough pulls away from the bowl sides.
- Knead until smooth:
- Turn onto a floured surface and knead for 6–8 minutes, pushing and folding until the dough becomes elastic and springs back when you press it.
- First rise:
- Place in a greased bowl, cover with a warm towel, and let it rise in a cozy spot until doubled in bulk, about an hour.
- Shape the loaves:
- Punch down gently, divide in half, and shape each piece into a loaf before tucking them into greased 9x5-inch pans.
- Second rise:
- Cover and let rise again until the dough creeps about an inch above the pan rims, roughly 30–45 minutes.
- Bake to golden:
- Slide into a 350°F oven for 25–30 minutes until the tops turn golden brown and the loaves sound hollow when tapped.
- Finish with butter:
- Brush with melted butter immediately for a soft, pillowy crust, then cool completely before slicing.
 Pin It
 Now whenever I smell yeast blooming in warm water, I'm back in that tiny kitchen, watching my grandmother's weathered hands shape dough with such practiced ease. This bread isn't just food—it's a connection to something simpler and sweeter.
Getting the Rise Right
I've learned that drafty kitchens are the enemy of bread dough. Find the warmest corner of your house, or turn your oven light on and let the dough rise inside—the gentle heat creates the perfect environment without being too intense.
Making It Your Own
One afternoon I swapped half the water for warm milk and added two tablespoons of honey, and the result was so divine it's now my go-to for company. Small tweaks like these transform a simple loaf into something memorable.
Storage and Freezing Tips
Once completely cooled, store the bread in an airtight bag on the counter for up to four days—never refrigerate it, as that accelerates staling. For longer storage, wrap whole loaves tightly in plastic wrap, then foil, and freeze for up to three months.
- Slice before freezing so you can grab just what you need
- Thaw frozen slices in the toaster for the best texture
- Day-old bread makes incredible French toast or bread pudding
 Pin It
 There's nothing quite like the pride of pulling two golden loaves from your own oven, knowing you created something so basic and beautiful from scratch.
Recipe FAQs
- → What makes Amish white bread different from regular white bread?
-
Amish white bread typically has a slightly higher sugar content and uses oil rather than just butter, creating a softer texture and subtle sweetness. The longer rising time develops better flavor and creates those characteristic air pockets.
- → Can I make this dough in a stand mixer?
-
Absolutely. Use the dough hook and mix on low speed for 2-3 minutes until flour is incorporated, then knead on medium-low for 5-6 minutes until smooth and elastic. The dough should cleanly pull away from the bowl sides.
- → How do I know when the dough has doubled in size?
-
Press two fingers gently into the dough—if the indentation remains and doesn't spring back, it's ready. The dough should look noticeably puffy and expanded. This usually takes about 1 hour in a warm, draft-free spot.
- → Why did my bread turn out dense?
-
Dense bread usually comes from under-kneading, insufficient rising time, or using water that's too hot which killed the yeast. Ensure your water is warm to the touch (110°F), knead until smooth, and let rise fully before baking.
- → Can I freeze this bread?
-
Yes, this bread freezes beautifully. Cool completely, wrap tightly in plastic wrap, then place in a freezer bag for up to 3 months. Thaw at room temperature or refresh in a 350°F oven for 10 minutes.
- → What's the best way to store homemade bread?
-
Keep in an airtight bag or bread box at room temperature for up to 4 days. For longer storage, slice and freeze. Refrigeration actually stales bread faster, so avoid the fridge unless you plan to make croutons or breadcrumbs.
