 Pin It
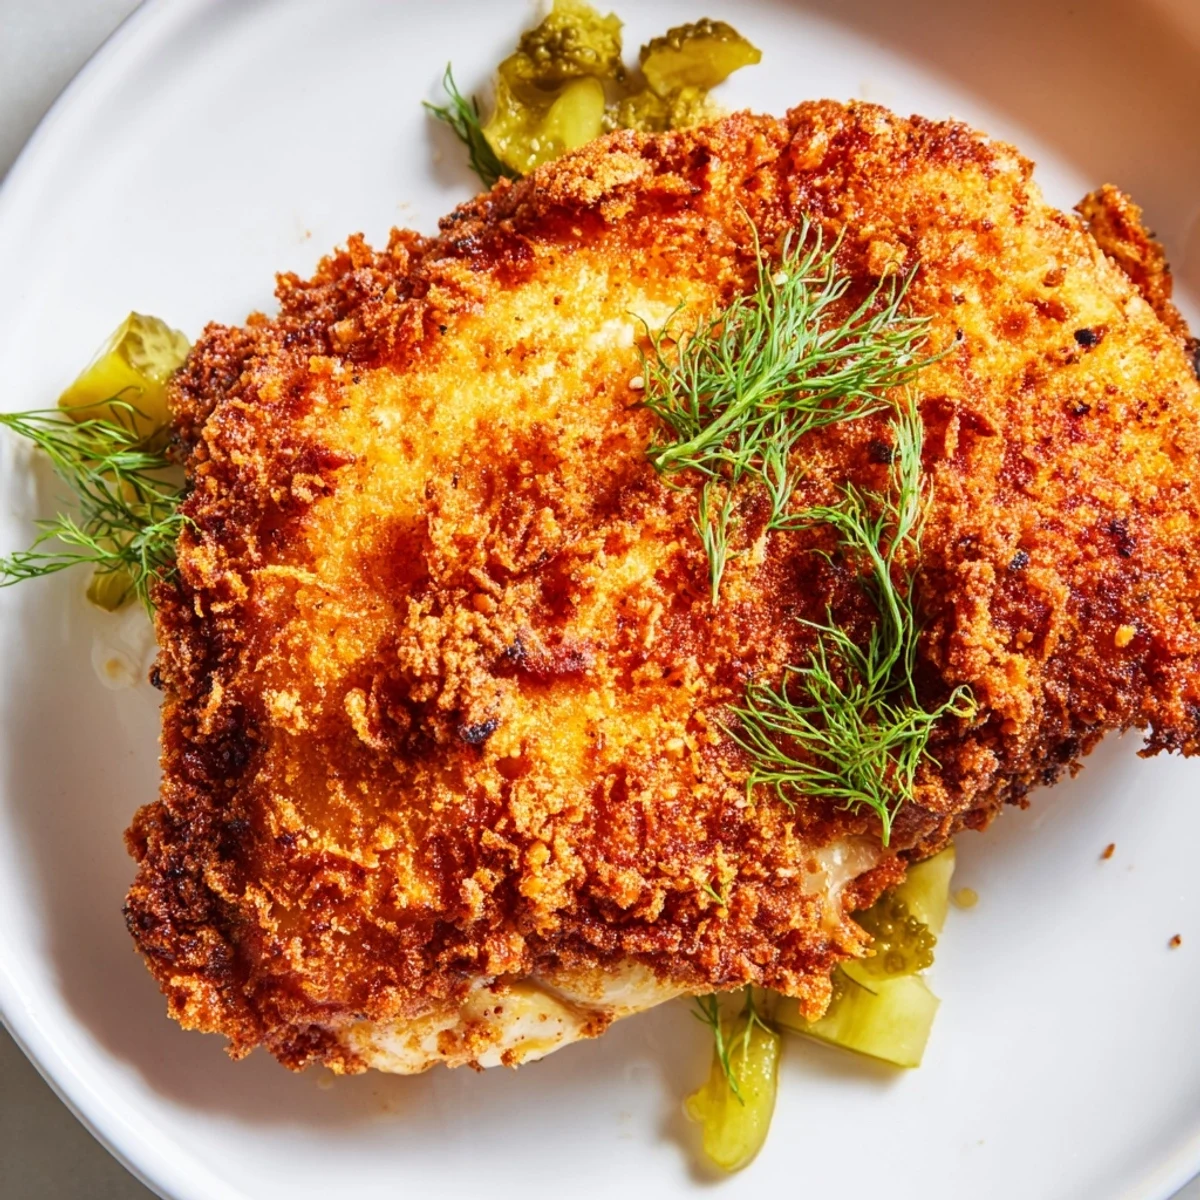
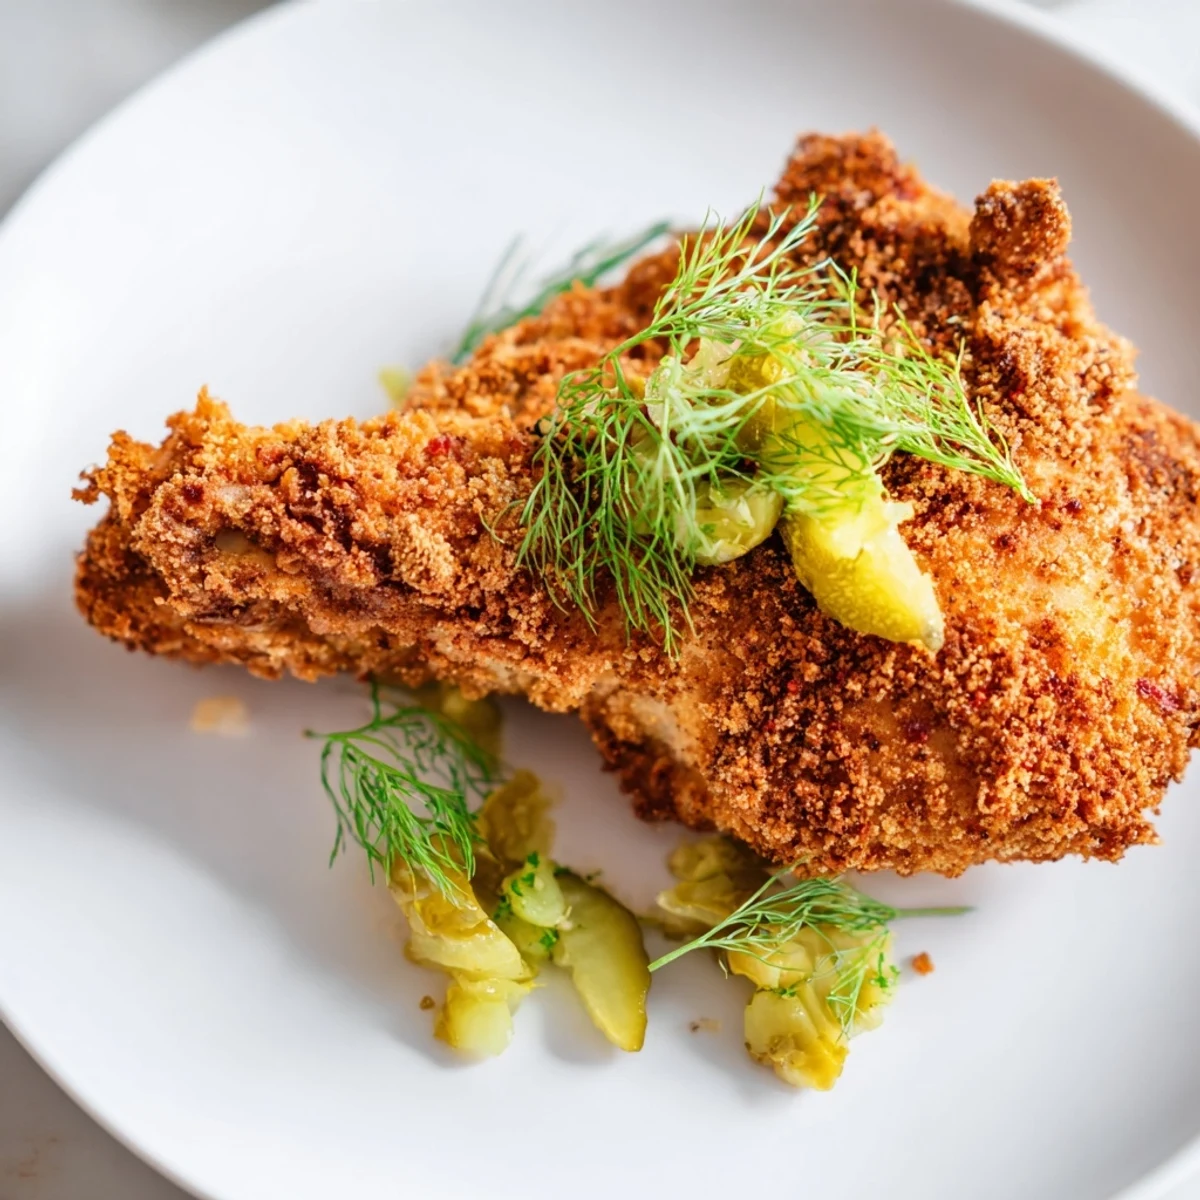
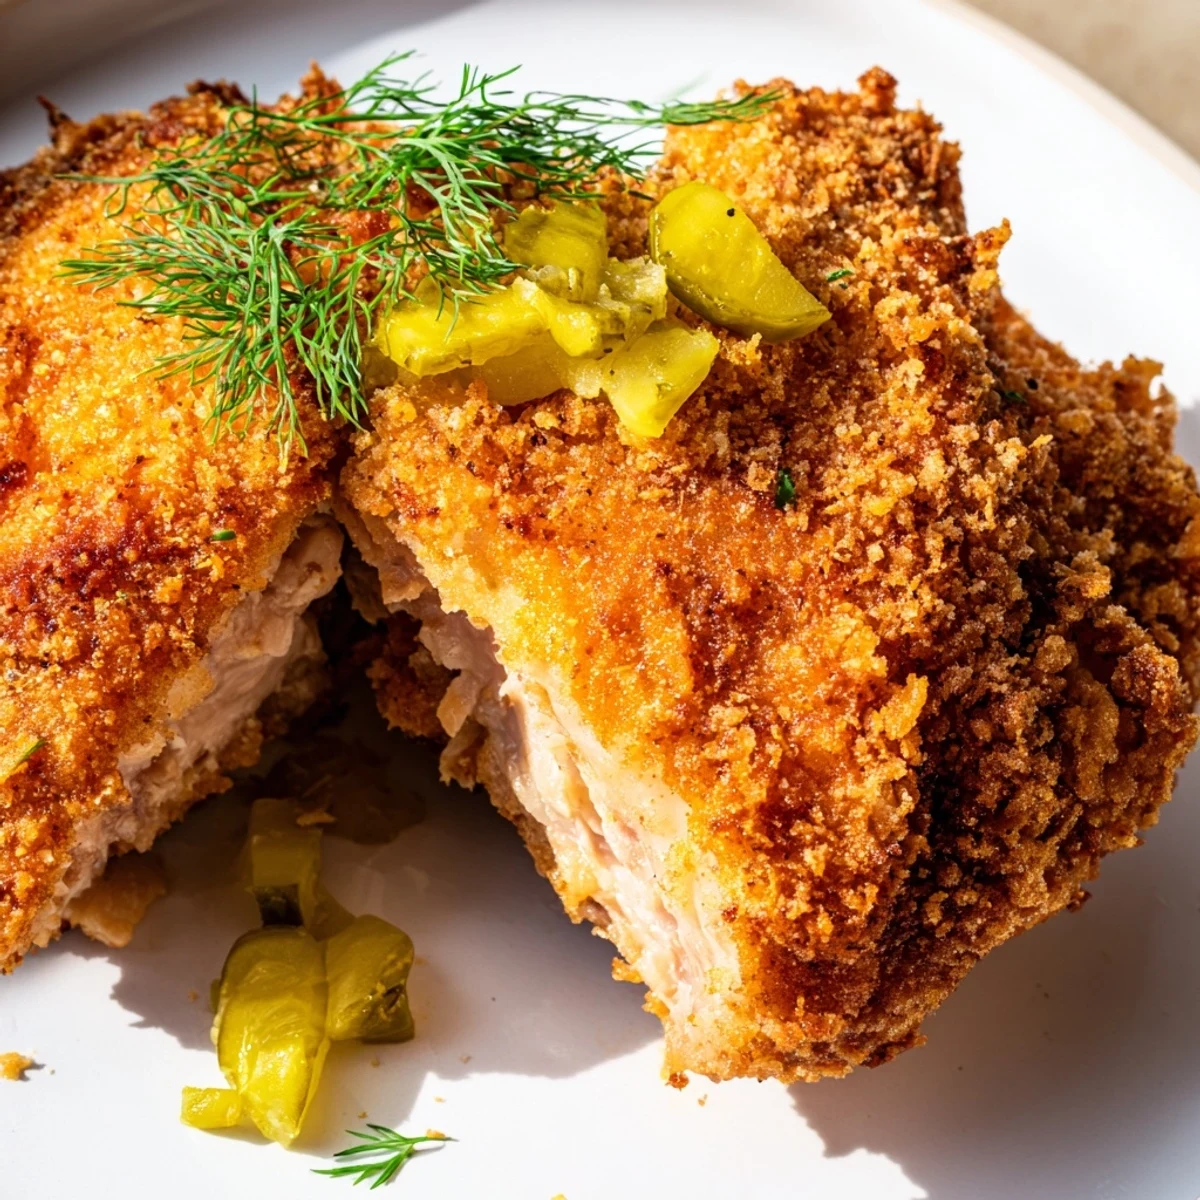
 Marinate chicken in dill pickle juice for ultimate tenderness and tangy flavor. Double-dredge in a seasoned flour and panko mixture, then fry until golden brown. The result is irresistibly crispy on the outside, juicy on the inside, with that signature dill pickle zing.
My grandmother always kept a jar of pickle juice in the fridge for reasons she never quite explained, and now I understand she was onto something brilliant. The first time I tried pickle-brined chicken at a roadside diner in Tennessee, I couldn't believe how something so simple could transform ordinary meat into something extraordinary. Now it's become my go-to when I want to serve something that makes people lean in and ask, what's the secret?
Last summer, my neighbor smelled this frying through our open kitchen window and actually knocked on the door to investigate. We ended up eating on the back porch with her family, passing around paper towels and extra pickles, while she admitted she'd been skeptical about pickle juice on chicken until that very first crunch.
Ingredients
- 4 boneless, skinless chicken thighs or breasts: Thighs stay juicier during frying, but breasts work beautifully if you prefer white meat and pound them to even thickness
- 1 cup dill pickle juice: The acidity here is doing all the heavy lifting, breaking down proteins for tenderness while adding that signature tang
- 2 tablespoons chopped dill pickles: These little bits of actual pickle get pressed into the coating, creating pockets of intense flavor
- 1 teaspoon garlic powder: Don't skip this, it bridges the gap between pickle brine and savory fried chicken perfectly
- 1 cup all-purpose flour: Creates the base layer that actually adheres to the meat
- 1 cup panko breadcrumbs: The secret to that extra-crunchy exterior that doesn't get soggy
- 1 teaspoon paprika: Adds subtle warmth and helps achieve that gorgeous golden color everyone wants
- 1 teaspoon onion powder: Works with the garlic to create a classic savory backbone
- ½ teaspoon salt and ½ teaspoon black pepper: Just enough to enhance without competing with the pickle brine
- 2 large eggs whisked with 2 tablespoons water: The glue that holds everything together
- Vegetable oil for frying: You need about 1 inch in the skillet, and something neutral with a high smoke point
Instructions
- Marinate for magic:
- Toss the chicken in that pickle brine with chopped pickles and garlic powder, seal it up, and let it sit in the fridge for at least an hour, though overnight is even better for maximum tenderness
- Set up your coating station:
- Whisk together the flour, panko, paprika, onion powder, salt, and pepper in one shallow bowl, then beat your eggs with water in another
- Double-dip for crunch:
- Pat the marinated chicken really dry, then dip it first in the flour mixture, then the egg wash, then back into the flour again, pressing firmly to help everything stick
- Fry to golden perfection:
- Heat your oil until it shimmers and a pinch of flour sizzles immediately, then fry the chicken for about 4-6 minutes per side until it's deeply golden and reaches 165°F inside
- Let it rest:
- Transfer to a wire rack instead of paper towels so air can circulate and that crust stays crispy
 Pin It
 My brother claimed he didn't like pickles at all until I made this for his birthday dinner. He ate three pieces and admitted maybe he'd just been eating the wrong kind of pickles his whole life.
Getting That Crisp Right
The panko breadcrumbs are doing the heavy lifting for crunch, but the double-dipping technique is what creates those gorgeous craggy bits that everyone fights over. Press the flour mixture firmly into the chicken during that second coating to ensure maximum surface area gets crispy.
The Temperature Sweet Spot
Too-cool oil means greasy chicken with sad, soft coating, while oil that's too hot burns the outside before the inside cooks through. I keep a thermometer handy and aim for 350-375°F, watching for that steady stream of bubbles around each piece that tells me the temperature is perfect.
Make It Your Own
The basic formula here is foolproof, but I've learned that swapping in spicy pickle juice creates a completely different experience that some people actually prefer. Hot Hungarian paprika can add subtle warmth without overwhelming the pickle tang.
- Chicken tenders cook faster and make fantastic appetizers or party food
- Let the chicken rest on a wire rack for at least 5 minutes before serving
- Extra dill pickles on the side aren't optional, they're essential
 Pin It
 There's something deeply satisfying about serving a dish that looks like it came from a restaurant but came together in your own kitchen. That first crunch against the silence at the dinner table is the best sound I know.
Recipe FAQs
- → How long should I marinate the chicken?
-
Marinate for at least 1 hour, but up to 12 hours for maximum flavor absorption and tenderness. The longer it marinates, the more pronounced the dill pickle taste becomes.
- → Can I bake this instead of frying?
-
Yes, arrange breaded chicken on a baking sheet sprayed with cooking spray. Bake at 400°F for 20-25 minutes, flipping halfway through. The crust won't be quite as crispy as fried, but still delicious.
- → What type of pickles work best?
-
Classic dill pickles or kosher dill pickles work perfectly. Avoid sweet pickles or bread-and-butter varieties, as they'll alter the flavor profile significantly.
- → How do I know when the chicken is done?
-
Use a meat thermometer to check for an internal temperature of 165°F (74°C). The crust should be golden brown and the juices should run clear when pierced.
- → Can I use pickle slices instead of juice?
-
You need the liquid brine for marinating to properly penetrate the meat. However, adding chopped pickles to the marinade as specified adds extra texture and flavor pockets.
- → What sides pair well with this dish?
-
Creamy potato salad, crisp coleslaw, or roasted vegetables balance the richness. A cold pilsner or tart lemonade cuts through the crispy coating perfectly.
